
1. Today, we’ll teach you how to prepare a tasty curd made from peanuts and green chilli crowns in your own kitchen
2. Method to Prepare Peanut Curd
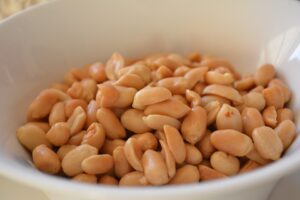
After that, soak these peanuts in water. How long should you soak it for? Only 4 hours
Don’t soak them for more than 4 hours. Otherwise, your curd won’t set well
After that, add these soaked peanuts to your mixer along with their peels. Add 400 ml water to it
Blend it for a few seconds until the mixture shows a chutney-like consistency
3. Now add 300 ml water to it and blend the mixture again
Always maintain this ratio. For 1 cup peanuts, use 700 ml water
After blending, the next step is filtering the mixture
Squeezing it! Squeeze out all the milk like this. So now your peanut milk is ready!
Now we have to boil this milk. So transfer the peanut milk to a big bowl and let it boil
Remember, it should only be exposed to a low flame in the start
You can slowly start increasing the heat and allow it to boil for 3-4 mins
Once it starts boiling, take it off the gas and allow it to cool down for a while
Now we just need to add the secret ingredient of fermentation – chilli tops!
These chilli crowns are full of bacteria that help your curd to set
Remember one thing – the chilli crowns you add must always be fresh. They should not be stored earlier
When the curd is setting, ensure the bowl is not disturbed. Allow it to ferment for 8-9 hours
4. After 8-9 hours, you can take it out, and look – your thick, creamy peanut curd is ready!
We can use it to prepare a variety of dishes
But after that, you don’t need to use chilli tops again
We know you might be thinking – “But how will this peanut curd taste? Won’t it be too peanutty in taste?”
But once you add other ingredients to it, you surely won’t know the difference between peanut curd and regular curd
5. We have also noticed that when you prepare the curd using curd from the previous batches,
after 5-6 times, the peanut flavour keeps reducing every time
Come, let’s understand the top 3 benefits of peanut curd
 6. Top 3 Benefits of Peanut Curd
Often, to increase the shelf life of packaged curd, a lot of chemicals and preservatives are added to it
Secondly, the dairy farms from which the milk to produce this curd is sourced, often mistreat the cows
On the other hand, we have peanut curd
You know it is pure because you can prepare it in front of your eyes, in your own kitchen
2nd benefit – you can use peanut curd in a variety of ways
So come, let’s prepare some of your favourite recipes
7. Satvic Papdi Chaat Recipe
First we’ll prepare a very tasty, crunchy and flavour-packed Paapdi Chaat
First, we’ll prepare the paapdi. Take 1 cup flour and mix ½ cup water to it
8. The thinner you roll them, the crispier the paapdi will be
Use a small round bowl to cut out small round paapdis from it,
Then pre-heat your oven setting the temperature at 260 degrees centigrade
Now place your paapdis inside to bake them
Remember, as soon as the paapdis turns light brown, take them out of the oven
The paapdis can be baked very quickly and might end up burning if you’re not careful
Next, we’ll learn how to prepare tamarind chutney. Take 1 cup tamarind pulp
2 cup dates. We had soaked them in hot water as well
Now add ½ cup water, 14 black pepper balls, 4 cardamom, ½ teaspoon roasted cumin powder and ½ teaspoon rock salt
Blend these ingredients well and now your tamarind chutney is ready!
Now it’s time to season your peanut curd
9. You can add a little bit of black salt and some roasted cumin powder to it. Mix it well
Let’s assemble our Paapdi Chaat now!
Take a few paapdis in a plate
First add your seasoned peanut curd to it, then some green chutney,
then some tamarind chutney, boiled potatoes, some sprouts – like alfalfa sprouts
some pomegranates and chopped coriander. Now your delicious paapdi chaat is ready!
10. Satvic Kadhi Recipe
Take a blender and add 1 cup peanut curd, 4 tablespoons gram flour, 2 cups water, and 1 teaspoon turmeric powder
1 green chilli, 12 curry leaves, and 1 teaspoon grated ginger
Roast these spices for a while and add your blended mixture slowly to it
See that it doesn’t start lumping. Add water as needed to dilute it and stir it for 30 mins, until the curry is cooked
Once you have finished cooking it, switch off the gas and add 4 tablespoons of lemon juice and 2 teaspoons of rock salt
Now your delicious curry is ready!
Enjoy it with brown rice
11. Like this, you can use peanut curd to recreate your favourite recipes
But maybe you’re all wondering – “Isn’t peanut curd very expensive?”
Come, let’s clear this through our final benefit of peanut curd
Today, the maximum price of a 1 kg packet of peanuts is around Rs. 200
To prepare 400 gm peanut curd, we have used only 100 gm peanuts, which means only Rs. 20
That means peanut curd is almost half the rate of dairy curd!
Come, let’s address some important FAQs
12. FAQs about Peanut Curd
How often should we consume peanut curd?
So if you’re living a sedentary lifestyle,
then you can consume it once or twice a week.
then you can have it 3-4 times a week
Is it necessary to soak the nuts?
All nuts have a very thin transparent coating on them, which are known as enzyme inhibitors
They prevent these nuts from being digested properly
When we soak the nuts, these enzyme inhibitors are washed away and your body can easily digest these nuts
Remember, you only need to soak the nuts for 4 hours. If you soak them for too long, your curd won’t set well
So this completes our peanut curd recipe
13. The next time your neighbour knocks on your door for some curd, why not show them the magic of peanuts and chillies
and treat them to some delicious peanut curd
Use your homemade peanut curd to prepare chaat, lassi and kadhi, and surprise them with it
If you found our video useful, then please subscribe to our channel
And don’t forget to watch our upcoming recipe